
|
Here's a quick little project I made to test out the Mayku FormBox! Also check out the MatterHackers Filament I used.
Servo Used: S05NF STD (although alternatives could be used) U-Joint: 2x https://amzn.to/30Ezv9x Bearings: 2x https://amzn.to/33zKZwU FormBox: https://amzn.to/3d5tTdq MatterHackers Silver PETG: https://www.matterhackers.com/store/l/silver-mh-build-series-petg-filament-175mm-1kg/sk/MEGEUHSN?aff=7517 MatterHackers Tough PLA White: https://www.matterhackers.com/store/l/paper-white-pro-series-tough-pla-filament-175mm-1kg/sk/MARVLS95?aff=7517 Downloads
1 Comment
Here's the assembly instructions for my 3D printed Arduino / Python controlled animatronic mouth!
Mechanics
Teeth/Tongue
OR
Downloads: Download Pack Instructable: https://www.instructables.com/id/Simple-Animatronic-Mouth-Using-3D-Printing-Arduino/ SUPPORT Recently I reviewed the mCreate 3D printer and laser cutter from makeblock. I was really pleased with its performance, and I designed this simple turbine model to test how well it would print some gears I designed. If you're interested in printing the model for yourself, you can find the STL files as well as the CAD model here! Turbine Model Download Pack
SUPPORT
Here's the instructional video on how to build my advanced, servo based animatronic heart mechanism using arduino and 3D printing. I designed it for use in a silicone jacket but you can use the fabric jacket from my previous tutorial too! Mechanism components:
Downloads:
SUPPORT
I wanted to make a realistic animatronic heart, and as I was developing the 3D printed mechanism I used a sock to try and get a vague idea of how the silicone skin would move once the design was finished. Since the silicone casting turned out to be quite challenging and very expensive, the sock test gave me the idea to instead use a slightly elastic fabric to make a plush heart design, which could be fitted over the 3D printed mechanism. Hardware and Tools
Downloads:
SUPPORT:
Over the next few weeks I'll be releasing the instructions for my animatronic heart mechanisms, but if you want to look at the files before then, you can download them below. This project came out great, I hope you guys can get some use out of it!
SUPPORT
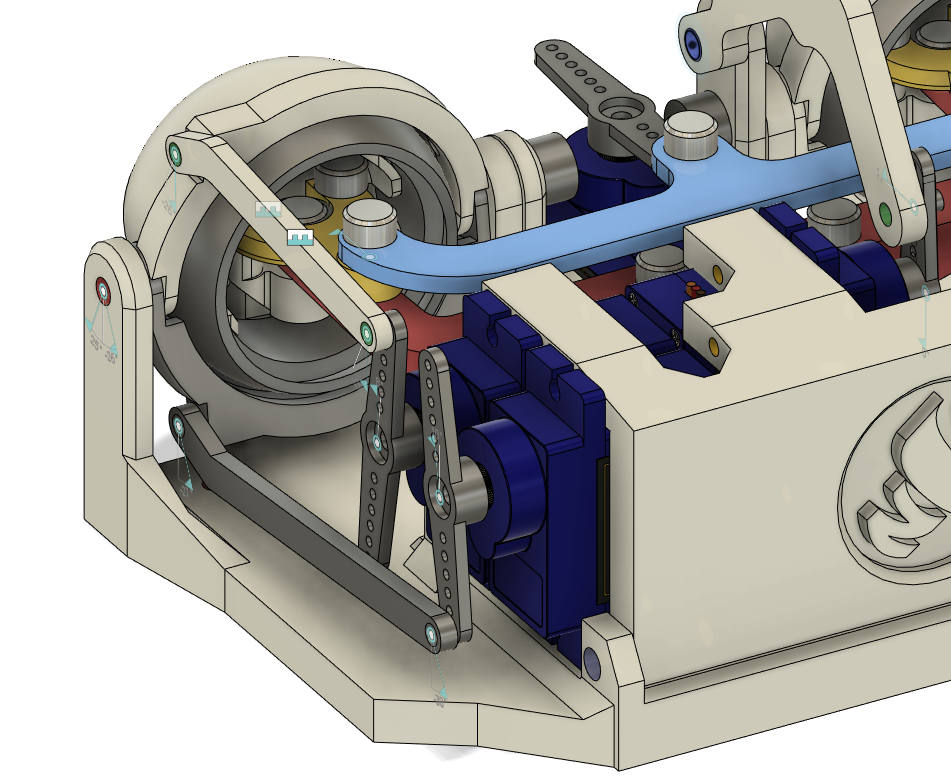
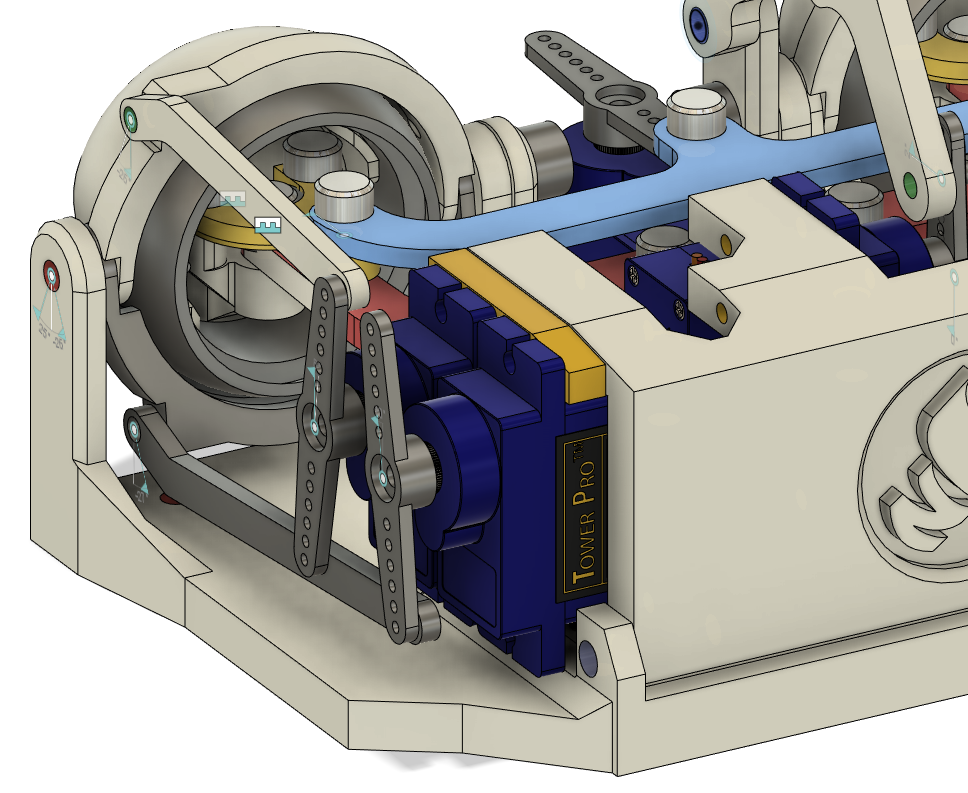
It's recently come to my attention that some of the SG90 servos people have a a little too tall for my design. I'm not sure why there's so much variation with these servos, but I've designed a spacer that can be used as shown in the images above (the spacer is the yellow component in the second picture) to give the servos more room.
Download the files here.
SUPPORT
Pretty much every project I've done just lately has required me to test out some servos and experiment with their positions before they go into the assembly. I usually make a quick servo tester on a breadboard and use the serial monitor in the arduino IDE to get the servo positions, but this time I decided I'd treat myself and design an enclosed, permanent system to test my servos!
The design can control 16 servos simultaneously, using the Adafruit PCA9685 servo driver board. In order to save space, it only has 4 potentiometers for adjustment and a seperate set of switches are used to select the set of four you'd like to control. One problem I encountered in early prototypes was that the design was pretty hard to solder and then cram into a little box, so this most recent design is printed flat, soldered and folded up, making it super easy to assemble! I used good quality potentiometers with an M9 mounting hole, but if you'd like to modify the Fusion 360 assembly to fit your requirements, feel free to download the file: https://a360.co/2Q366j4 (or just drill it bigger). I hope you'll enjoy this quick project, I know I'll get a ton of use out of mine! SUPPLIES
Downloads
SUPPORT
Here's an animatronic eye mechanism I made using machining tools like a lathe, as well as 3D printing and arduino. Although I'm sure a lot of you guys don't have acess to a lathe, I hope you'll still enjoy watching the build process! Electronics:
Hobby Components:
Machining Stuff - Check the schematics in the machining step to see all the components which need machining, it also has a rough guide to the lengths of stock you could start with. You might want some margin for errors, but roughly speaking you'll need:
Downloads:
SUPPORT
I wanted a compact and easy to use controller for all the eye mechanisms I've designed that would allow me to control them easily with one hand - including away to move the eyes, adjust how open/closed the eyelids are and blink. Since most controllers don't have a dial you can use to select a specific value (and then let go of it), this prompted me to design a controller that has a push-to-make switch and a joystick as well as a potentiometer you can use to fine-tune a value. It uses easy-to-acquire parts, but if you'd prefer to use a high-quality joystick, the design can accommodate for that too. Of course you could use this design for any application you like. This design is quite easy to make using easy to acquire parts, and the 3D printing doesn't need to be particularly good either. The hardest part is soldering, but I'd say it would be possible to build it using just jumper cables - not that I'd recommend it!
Supplies:
Downloads:
|
 RSS Feed
|
As an Amazon Associate I earn from qualifying purchases (at no cost to you).
By accessing any content produced by Nilheim Mechatronics or Will Cogley, you agree to the Terms of Service. |